Table of Contents
This document describes how to setup and use Dia together with Python (PyDia) and PyGtk on Windows.
PyDia adds additional functionality to Dia and can be used to develop Dia plug-ins in Python.
Install Python, Dia and PyGtk.
Dia for Windows currently only supports Python 2.3
![[Note]](images/note.png) | Note |
|---|---|
Newer Python versions can be installed in parallel without any problems. |
![[Note]](images/note.png) | Note |
|---|---|
Dia on Linux supports more recent Python versions. |
Python 2.3.5 is available from http://python.org/download/releases/2.3.5/. The direct download link for the installer is http://python.org/ftp/python/2.3.5/Python-2.3.5.exe.
Dia for Windows is available from http://dia-installer.de.
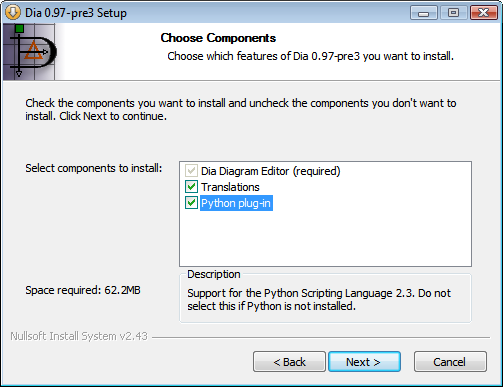
When installing Dia, make sure that you select the Python plug-in (Figure 1, “Python plug-in”).
Congratulations! You're able to use PyDia now. If you want to develop or use scripts that use the PyGtk graphical user interface, please read on.
![[Note]](images/note.png) | Note |
|---|---|
The PyGtk installation is optional, you can also use PyDia without it. However, many PyDia plugins, like the rotation plugin require PyDia. If you're not sure if you need PyGtk, simply install it. |
Install PyCairo 1.0.2. It is available from http://ftp.gnome.org/pub/GNOME/binaries/win32/pycairo/1.0/pycairo-1.0.2-1.win32-py2.3.exe.
PyCairo is required by PyGtk
Install PyGtk 2.8.6. It is available from http://ftp.gnome.org/pub/GNOME/binaries/win32/pygtk/2.8/pygtk-2.8.6-1.win32-py2.3.exe.
![[Note]](images/note.png) | Note |
|---|---|
The Python Console is only of interest for Python developers. If you are not a Python developer, please skip this chapter. |
Once Python, Dia and PyGtk are installed, you should be able to start the Dia Python console by selecting from the menu.
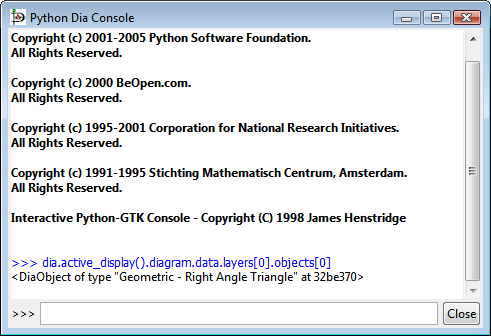
In order to select the first object in the first layer of the active diagram, you could enter the following statement in the Python Console:
dia.active_display().diagram.data.layers[0].objects[0]
Figure 2, “Python Console” shows how the result could look like.
Installing Dia plug-ins that are written is Python is as easy as saving the file in the right folder.
Dia will look for plug-ins in two different places: The Dia installation folder
as well as a personal .dia\python folder. The .dia
folder is created by Dia in your home directory (e.g. c:\documents and settings\<username>\.dia\python).
![[Note]](images/note.png) | Note |
|---|---|
If you are not a Python developer, please skip this chapter. |
Implementing a plug-in is as simple as registering a callback function.
Dia will look for plug-ins in two different places: The Dia installation folder
as well as a personal .dia\python folder. The .dia
folder is created by Dia in your home directory (e.g. c:\documents and settings\<username>\.dia\python).
To create a simple Hello World example, add a hello.py
file in your Dia installation directory or .dia\python folder.
Add the following contents:
import dia

def hello_callback(data, flags):
    dia.message(2, "Hello, World!\n")

dia.register_callback("Hello World", "<Display>/Tools/Hello", hello_callback)
(Re)start Dia and select from the menu.
Congratulations! You're created your first Dia plug-in.
Your dia installation folder contains a collection of Python scripts that you can use as a reference.


